


To successfully launch your Canva website, follow these essential steps: prepare your design for a professional look, utilize Canva’s complimentary hosting for easy access, acquire a custom web address for branding, link your existing domain to your site, and adjust essential settings for optimal performance. Each phase enhances your site’s visibility and user experience, ensuring a smooth online presence.
Are you ready to take your design to the next level? Publishing your Canva website is easier than you think! In this guide, we’ll walk you through the essential steps to get your site live and thriving.
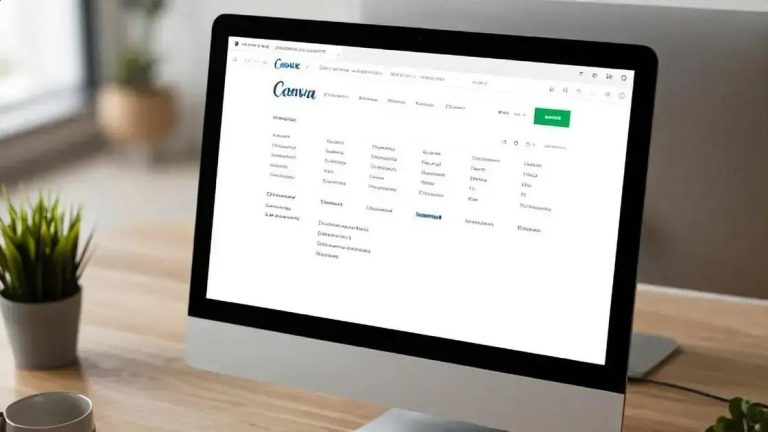
Phase 1: Preparing for the Launch
Before you launch your Canva website, it’s important to prepare properly. This phase is all about making sure everything is set up for success. Start by reviewing your design. Look for any last-minute changes you want to make. It’s easy to overlook small details, so take your time here.
Next, ensure that all your images and text are clear and engaging. High-quality images can make a big difference in how your site looks. Use Canva’s tools to adjust brightness and contrast if needed. Make sure your text is easy to read. Use simple fonts and colors that contrast well with the background.
Once you’re happy with the design, it’s time to check your links. Make sure all buttons and links work correctly. There’s nothing worse than a broken link on launch day! Test each link to ensure it directs users to the right page.
Another important step is to set up your site’s SEO. This means adding keywords to your titles and descriptions. Keywords help people find your site through search engines. Use your main keyword, like “Canva website,” in strategic places. This will improve your chances of appearing in search results.
Don’t forget about mobile optimization! Many users will visit your site on their phones. Check how your site looks on different devices. Canva allows you to preview your design on mobile. Make adjustments as needed to ensure a smooth experience for all users.
Finally, gather feedback from friends or colleagues. They can provide valuable insights that you might have missed. Ask them to navigate your site and share their thoughts. Use their feedback to make any final tweaks before launch.
By taking these steps in the preparation phase, you’ll set a solid foundation for your Canva website. A well-prepared launch can lead to a successful online presence.
Phase 2: Utilizing the Complimentary Hosting Option
Once your Canva website design is ready, it’s time to think about hosting. Canva offers a complimentary hosting option that makes launching your site easy. This is a great choice for beginners who want to get started without spending money.
Using Canva’s free hosting means you don’t need to worry about technical details. You won’t have to buy a separate hosting plan. Canva takes care of all the hosting for you. This allows you to focus on creating great content and designs.
To use this option, you simply need to publish your site through Canva. When you do this, Canva will generate a web address for you. This address will look something like yourdesign.canva.site. It’s simple and easy to remember.
However, keep in mind that while this option is free, it may not be as professional as having your own custom domain. If you want to build a brand, you might consider getting a custom domain later on. But starting with the complimentary option is a smart way to launch quickly.
Once your site is live, you can share the link with friends, family, and potential customers. This is a great way to get feedback and start building an audience. You can also use social media to promote your new site. Share your link on platforms like Facebook, Instagram, and Twitter.
Another benefit of using Canva’s hosting is that it’s user-friendly. You can make updates and changes to your site anytime. If you want to add new content or change your design, it’s easy to do. Just log into your Canva account, make your changes, and republish your site.
In addition, Canva’s hosting is secure. Your site will be protected from common online threats. This gives you peace of mind as you share your work with the world. You can focus on your creativity without worrying about technical issues.
Overall, utilizing Canva’s complimentary hosting option is a smart move. It allows you to launch your site quickly and easily. As you grow, you can always upgrade to a custom domain and more advanced hosting options.
Phase 3: Acquiring a New Custom Web Address
After launching your Canva website, you might want to acquire a new custom web address. A custom domain gives your site a professional touch. It makes it easier for visitors to remember your site. Instead of using a free Canva URL, you can choose a unique name that reflects your brand.
To get started, think about what you want your domain name to be. It should be simple and catchy. Ideally, it should relate to your business or the content of your site. Try to keep it short and easy to spell. This helps visitors find you quickly.
Once you have a few ideas, check if they are available. You can do this through domain registrars like GoDaddy or Namecheap. These sites let you search for your desired domain name. If it’s taken, they often suggest alternatives. You can also check if similar names are available.
After choosing your domain, you’ll need to purchase it. Prices vary based on the domain extension you choose, like .com, .net, or .org. Some extensions are more popular and may cost more. Make sure to review the registration terms, as some domains require renewal each year.
Once you own your domain, you’ll need to connect it to your Canva website. Canva provides instructions on how to do this. It usually involves updating your domain settings to point to your Canva site. This process can take a few hours to a couple of days to fully propagate.
Having a custom web address can enhance your online presence. It helps with branding and can improve your search engine optimization (SEO). Search engines often favor custom domains over free ones. This means your site could rank higher in search results.
Additionally, a custom domain can build trust with your audience. Visitors are more likely to click on a site with a professional domain name. It shows you’re serious about your business and your online presence.
In summary, acquiring a new custom web address is a valuable step for your Canva website. It not only boosts your brand image but also improves user experience and SEO. Take the time to choose the right domain name and connect it properly for the best results.
Phase 4: Linking an Existing Custom Web Address
If you already own a custom web address, linking it to your Canva website is a smart move. This process allows you to use your established domain while benefiting from Canva’s design tools. It’s a great way to maintain your brand identity online.
First, log into your Canva account and go to your website settings. Look for the option to connect a custom domain. Canva provides clear instructions to guide you through this process. You’ll need to enter your existing domain name when prompted.
Next, you’ll need to access your domain registrar’s website. This is the company where you purchased your domain. Common registrars include GoDaddy, Namecheap, and Google Domains. Log in to your account there to make the necessary changes.
In your domain settings, look for the option to manage DNS records. DNS stands for Domain Name System. It’s what connects your domain name to the web server where your site is hosted. You’ll need to add a CNAME record to point your domain to Canva.
Canva will provide you with the specific CNAME value to use. This value is unique to your Canva website. Once you have this, go back to your domain registrar and enter it in the appropriate field. Make sure to save your changes.
After updating your DNS settings, it may take some time for the changes to take effect. This process is called DNS propagation. It can take anywhere from a few minutes to 48 hours. During this time, your website may not be accessible through your custom domain.
Once the changes have propagated, your custom web address will link directly to your Canva website. This means visitors can now access your site using your unique domain name. It’s a seamless way to enhance your online presence.
Having your own domain linked to your Canva site not only looks professional but also helps with branding. It makes it easier for people to remember your website. Plus, it can improve your search engine rankings, as search engines often favor custom domains over free ones.
In summary, linking an existing custom web address to your Canva website is a straightforward process. By following the steps above, you can ensure that your brand stands out online while enjoying the benefits of Canva’s design capabilities.
Phase 5: Adjusting Essential Site Settings
After linking your custom web address, it’s time to adjust essential site settings. This step is crucial for ensuring your Canva website runs smoothly. Proper settings can enhance user experience and improve your site’s performance.
First, log into your Canva account and navigate to your website settings. Here, you’ll find various options to customize your site. Start by reviewing your site title and description. These elements are important for SEO. Make sure they clearly describe your website’s purpose.
Next, check your site’s privacy settings. You can choose to make your site public or password-protected. If you’re just starting, you might want to keep it public. This allows everyone to see your work. However, if you’re still in the testing phase, a password can help keep your site private.
Another important setting is the favicon. A favicon is a small icon that appears in the browser tab. It helps users identify your site quickly. Canva allows you to upload a custom favicon. Choose an image that represents your brand well.
Next, consider your site’s navigation. Make sure it’s easy for visitors to find what they need. Organize your pages logically. Use clear labels for your menu items. This helps users navigate your site without confusion.
Additionally, check your site’s loading speed. A slow site can frustrate visitors and lead to higher bounce rates. Canva optimizes images automatically, but you should still keep an eye on your content. Avoid using too many large images or videos on a single page.
Don’t forget to enable analytics. Tracking your site’s performance is essential. You can use tools like Google Analytics to monitor traffic and user behavior. This data helps you understand what works and what needs improvement.
Finally, test your site on different devices. Make sure it looks good on desktops, tablets, and smartphones. Canva allows you to preview your site in various formats. This ensures a seamless experience for all users.
By adjusting these essential site settings, you can create a better experience for your visitors. A well-configured site not only looks professional but also functions effectively. Take the time to make these adjustments for the best results.