


Pressable offers managed WordPress hosting with optimized performance, security, and expert support. It simplifies site migration using automated tools and plugins, ensuring a smooth transfer of files, themes, and databases. Pressable plans cater to various site sizes, providing scalable resources and features like staging environments and free SSL certificates. The migration process involves updating your live site, backing up data, initiating migration via the Pressable dashboard, monitoring progress, handling any unmigrated files, and cleaning up old hosting accounts with password resets. This comprehensive approach helps maintain site integrity, security, and uptime during the transition.
If you’re thinking about moving your WordPress site, Pressable offers a managed hosting solution that makes migration easier than you might expect. Curious how to switch without headaches? Let’s dive in and explore the process step-by-step.
Why Choose Pressable for Your WordPress Site?
Pressable is a managed WordPress hosting service designed to make your website faster, safer, and easier to manage. It offers expert support and powerful tools tailored specifically for WordPress sites. This means you get a hosting environment optimized to run WordPress smoothly without the usual hassles.
One major reason to choose Pressable is its focus on performance. Your site loads quickly thanks to advanced caching and a global content delivery network (CDN). Faster loading times improve user experience and can boost your search engine rankings. Pressable also handles updates and security, so you don’t have to worry about keeping your site safe from hackers or outdated software.
Another benefit is the excellent customer support. Pressable’s team knows WordPress inside and out. They can help with technical issues, migration, and optimization. This expert help is available 24/7, giving you peace of mind that your site is in good hands anytime you need assistance.
Pressable also offers scalable plans, so whether you have a small blog or a large business website, you can find a hosting plan that fits your needs. The platform includes useful features like staging environments, which let you test changes before making them live. This helps prevent errors and downtime.
Security is a top priority at Pressable. They provide automatic backups, malware scanning, and free SSL certificates to keep your site protected. These features reduce the risk of data loss and help maintain your visitors’ trust.
Overall, Pressable simplifies managing a WordPress site by combining speed, security, and expert support. If you want a hassle-free hosting experience that helps your site perform at its best, Pressable is a solid choice worth considering.
Choosing the Right Pressable Plan
Choosing the right Pressable plan depends on your website’s size, traffic, and specific needs. Pressable offers several plans designed to fit different types of WordPress sites, from small blogs to large business websites. Each plan includes features that help your site run smoothly and securely.
For smaller sites or personal blogs, the basic plan offers enough resources to get started. It includes fast loading speeds, daily backups, and expert support. This plan is perfect if you don’t expect heavy traffic but still want reliable performance and security.
If your site gets more visitors or you run a business online, you might want a plan with more storage and bandwidth. Pressable’s mid-tier plans provide extra space, better performance, and additional tools like staging environments. Staging lets you test changes before making them live, which helps avoid errors on your main site.
For larger businesses or sites with high traffic, the advanced plans offer the most resources. These include higher limits on visitors, storage, and database size. You also get priority support and advanced security features. This ensures your site stays fast and secure even during traffic spikes.
All Pressable plans come with free SSL certificates, which encrypt data to protect your visitors. They also include automatic WordPress updates, so your site stays up-to-date without extra effort. Plus, Pressable offers a 30-day money-back guarantee, letting you try the service risk-free.
When choosing a plan, consider your current needs and future growth. It’s smart to pick a plan that can scale as your site grows. Pressable makes it easy to upgrade your plan anytime without downtime or hassle.
In summary, Pressable’s plans are flexible and designed to support WordPress sites of all sizes. Take time to review your site’s traffic and features to find the best fit. This ensures you get the right balance of performance, security, and cost for your WordPress hosting.
Step 1: Update Your Live Site Before Migration
Before you start migrating your WordPress site to Pressable, it’s important to update your live site. This means making sure all your themes, plugins, and WordPress core are running the latest versions. Updates fix bugs, improve security, and add new features that keep your site running smoothly.
Start by logging into your WordPress dashboard. Check for any available updates under the “Updates” section. You’ll see notifications if your plugins, themes, or WordPress itself need updating. It’s best to update everything to avoid compatibility issues during migration.
Updating your live site also helps prevent security risks. Older versions of plugins or themes might have vulnerabilities that hackers can exploit. Pressable’s hosting environment is secure, but it’s still smart to keep your site updated before moving it.
While updating, take note of any plugins or themes that haven’t been updated by their developers in a long time. These could cause problems after migration. Consider replacing them with better-supported alternatives if needed.
After updating, test your site thoroughly. Visit different pages, check forms, and test key functions like shopping carts or contact forms. This helps ensure your site works well before migration. If you find issues, fix them now to avoid bigger problems later.
Backing up your site before updating is also a good idea. Although updates usually go smoothly, backups protect you if something goes wrong. You can use plugins or your hosting provider’s tools to create a full backup of your site and database.
Taking these steps to update your live site before migration helps make the process smoother. It reduces the chance of errors and ensures your WordPress site is ready for the new hosting environment at Pressable.
Step 2: Backup Your WordPress Site Safely
Backing up your WordPress site is a key step before migrating to Pressable. A backup is a copy of your website files and database. It protects your site in case something goes wrong during the migration. You can restore your site quickly if needed.
There are several ways to back up your WordPress site. One easy method is to use a backup plugin. Plugins like UpdraftPlus or BackWPup let you create full backups with just a few clicks. They can save your backup files to cloud storage services like Google Drive or Dropbox for extra safety.
You can also back up your site manually. This involves downloading your website files using an FTP client and exporting your database from your hosting control panel. While manual backups take more time, they give you full control over your data.
Make sure to back up both your files and your database. Files include themes, plugins, and media uploads. The database holds all your content, settings, and user information. Without both, your backup won’t be complete.
After creating your backup, test it to ensure it works. You can restore it on a test site or local server to check if everything is intact. This step helps avoid surprises during migration.
Keep your backup files safe and accessible. Store them in multiple locations if possible. This way, you won’t lose your data even if one storage option fails.
Regular backups are a good habit, not just before migration. They protect your site from hacks, crashes, or accidental changes. With a reliable backup, you can manage your WordPress site confidently and securely.
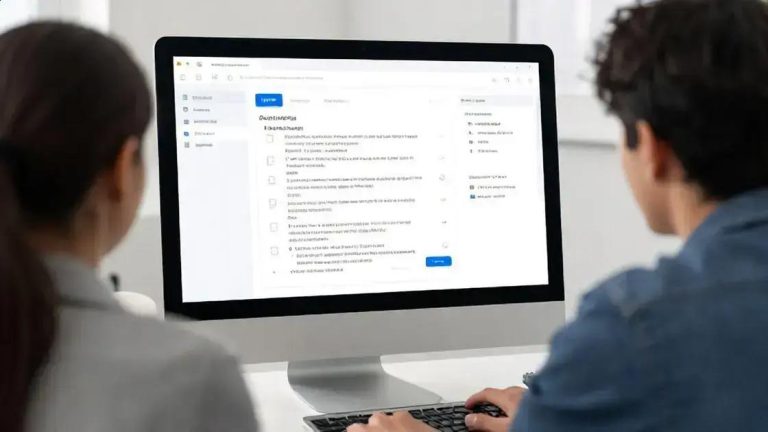
Step 3: Initiate Migration in Pressable Dashboard
To start moving your WordPress site to Pressable, you need to initiate the migration from the Pressable dashboard. This dashboard is your control center for managing your hosting account and website migration. It’s designed to be user-friendly, even if you’re not very tech-savvy.
First, log in to your Pressable account. Once inside, look for the migration option or section. Pressable offers an automated migration tool that simplifies the process. You’ll be asked to provide details about your current site, like the URL and login credentials. This information helps Pressable connect to your existing site and copy your files and database.
During this step, it’s important to enter accurate information. Mistakes in your site URL or login details can cause the migration to fail or stall. Double-check everything before submitting the migration request.
After submitting, the migration process begins on Pressable’s servers. You can monitor its progress from the dashboard. The tool will copy your site’s content, themes, plugins, and database to the new hosting environment. This usually takes some time depending on your site’s size.
If you have a large site, the migration might take longer. Pressable’s dashboard will notify you when the migration is complete or if any issues arise. You can also pause or cancel the migration if needed.
Using the Pressable dashboard to initiate migration saves you from manual file transfers or complex setups. It automates much of the work, reducing the chance of errors. Plus, it gives you control and visibility over the whole process.
Remember to keep your current site live and unchanged during migration. This ensures that Pressable copies the latest version of your site. Once migration finishes, you can proceed with testing and finalizing the move.
Step 4: Continue and Monitor the Migration Process
Once you’ve started the migration in the Pressable dashboard, it’s important to keep an eye on the process. Monitoring helps you catch any issues early and ensures the migration runs smoothly. The dashboard shows progress updates and alerts if something needs your attention.
During migration, Pressable copies your website files, database, themes, and plugins to their servers. Depending on your site size, this can take some time. You can check the progress bar or status messages in the dashboard to see how far along the migration is.
If the migration stalls or shows errors, don’t panic. Sometimes, network issues or incorrect login details cause delays. The dashboard usually provides hints on what went wrong. You can pause the migration, fix the issue, and then resume it.
It’s a good idea to keep your original site live and unchanged while migration runs. This way, Pressable copies the latest version of your content. Avoid making big changes or updates during this time to prevent data mismatch.
Pressable also offers notifications to keep you informed. You might get emails or dashboard alerts when migration completes or if manual steps are needed. Stay alert to these messages to act quickly.
Once migration finishes, take time to review your new site on Pressable’s servers. Check that all pages, images, and functions work as expected. If you spot missing content or broken links, you can address them before switching your domain to Pressable.
Monitoring your migration closely helps avoid surprises and ensures a smooth transition. The Pressable dashboard is designed to make this easy, giving you control and clear updates every step of the way.
Step 5: Use the Pressable Automated Migration Plugin
Using the Pressable Automated Migration Plugin makes moving your WordPress site easier. This plugin helps transfer your files, themes, plugins, and database automatically. It saves time and reduces mistakes compared to manual migration.
To get started, install the plugin on your current WordPress site. You can find it in the WordPress plugin directory or upload it manually. Once activated, the plugin will guide you through connecting your site to your Pressable account.
The plugin asks for your Pressable login details and site information. This helps it securely access your new hosting environment. After connecting, it begins copying your website data to Pressable’s servers. The process runs in the background, so you can continue working on your site.
One great feature of this plugin is that it handles most technical steps automatically. It copies your database, uploads, themes, and plugins without you needing to move files manually. This reduces the chance of missing something important.
During migration, the plugin shows progress updates. You can see which parts are done and if any issues come up. If errors occur, the plugin usually suggests ways to fix them or retry the migration.
After the migration finishes, you can preview your site on Pressable’s servers. This lets you check if everything looks and works correctly before making your site live on the new host.
Using the Pressable Automated Migration Plugin is a smart way to switch hosts without hassle. It’s designed to be user-friendly and reliable, even for those new to WordPress migration. This tool helps ensure your move to Pressable is smooth and stress-free.
Step 6: Check and Handle Files Not Migrated
After the migration process with Pressable, it’s important to check for any files that didn’t migrate. Sometimes, certain files or folders might be skipped due to size limits or permission issues. Identifying these missing files helps keep your site complete and functional.
Start by reviewing the migration report in the Pressable dashboard. This report lists any files or data that failed to transfer. Common files that may not migrate include large media files, custom uploads, or cache files.
If you find missing files, you can manually upload them to your new Pressable site. Use an FTP client or the file manager in your hosting control panel. Make sure to place files in the correct folders to avoid broken links or missing images on your site.
For large media files, consider compressing them before uploading. This reduces file size and upload time. Also, check file permissions to ensure Pressable’s servers can access and serve these files properly.
Sometimes, plugins or themes create files outside the usual WordPress folders. These might not migrate automatically. Check your site’s root directory and wp-content folder for any custom files that need manual transfer.
It’s also a good idea to clear your site’s cache after migration. Cached files can cause your site to display outdated content or errors. Clearing cache ensures visitors see the latest version of your site.
Regularly testing your site after migration helps catch any missing content or errors early. Browse different pages, check images, and test forms or other interactive features. Fix any issues by uploading missing files or adjusting settings.
Handling files not migrated carefully ensures your WordPress site works perfectly on Pressable. Taking these extra steps helps avoid downtime and keeps your visitors happy.
Step 7: Clean Up Old Hosting and Reset Passwords
After successfully migrating your site to Pressable, it’s time to clean up your old hosting account. This step helps prevent security risks and avoids unnecessary charges from your previous host. Start by backing up any remaining important files or emails you might still need.
Next, delete your website files and databases from the old server. This frees up space and ensures no outdated content remains accessible. You can do this through your hosting control panel or by contacting your old host’s support team.
Don’t forget to cancel your old hosting plan to stop future billing. Some hosts require you to manually cancel subscriptions, so double-check your account settings or billing section.
Resetting passwords is another important step. Change passwords for your old hosting account, FTP, database, and any related services. This prevents unauthorized access after you’ve moved your site.
Also, update your domain name settings to point to Pressable’s servers. This usually involves changing DNS records, such as nameservers or A records. Your domain registrar or Pressable support can guide you through this process.
Keep an eye on your site after switching DNS to make sure everything works correctly. DNS changes can take up to 48 hours to fully propagate worldwide, so be patient during this time.
Cleaning up old hosting and resetting passwords helps protect your site and data. It also ensures your new hosting environment at Pressable runs smoothly without conflicts or security risks from previous setups.